Fitting Recaros
Are you sitting comfortably?
Added: 5th February 2006 // Updated: 31st August 2008
Introduction
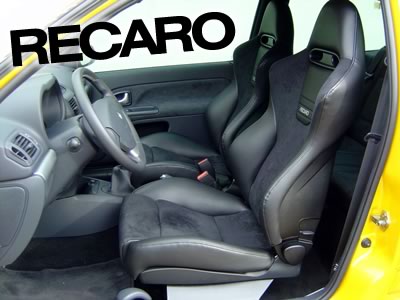
The Clio 172 and 182 are fantastic cars but unfortunately let down by unsupportive seats and a poor driving position. This was something Renault addressed in the later 182s by offering Recaro seats as an option and as original equipment in the Trophy. As well as being a lot more comfortable and supportive they also look fantastic. Many other seats can be fitted but the Recaros have that certain something, no-doubt due to the “enhanced OEM” type appeal.
Renault didn’t spec any changes to the trim or seat design, so the seats you can buy aftermarket are identical to the ones Renault fit as OEM. There are two advantages to obtaining the seats this way:
- The leather/alcantara rears and door cards are retained
- The Recaro subframes mount the seats 10mm lower than the Trophy/182 subframes Renault use
This guide will explain in detail how to install the seats into any Clio, specifically the side airbag equipped 172, 182 and V6. Most of the process is covered in the excellent Recaro instructions but I have expanded, detailing some additional information which will be of help, and also providing photographs which the instructions lack.
The seats and fittings required should be available from any Recaro dealer. I highly recommend Capital Seating who were incredibly helpful and at the same time cheaper than Recaro’s RRP.
Parts required
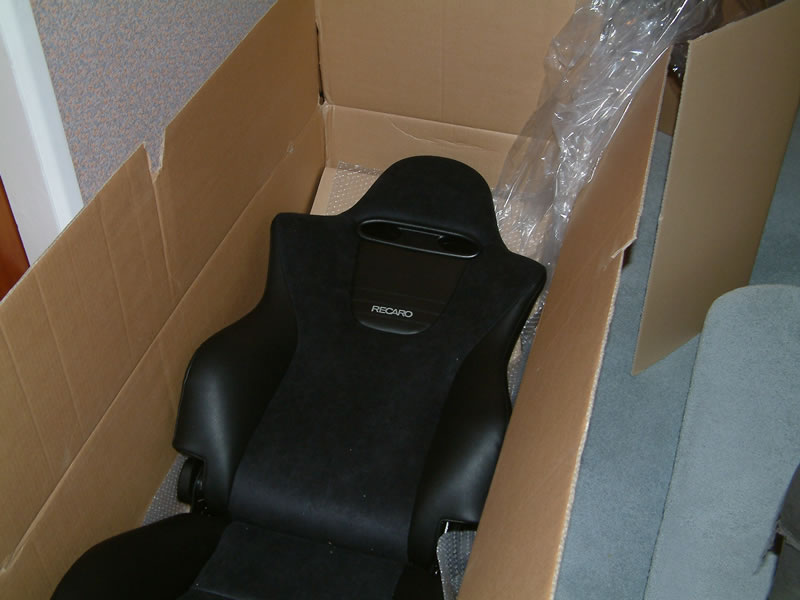
- 2 x 265000575 - Sport Trendline with belt guides, Ambla-Leather black / Dinamica Suede black. £545.00 each
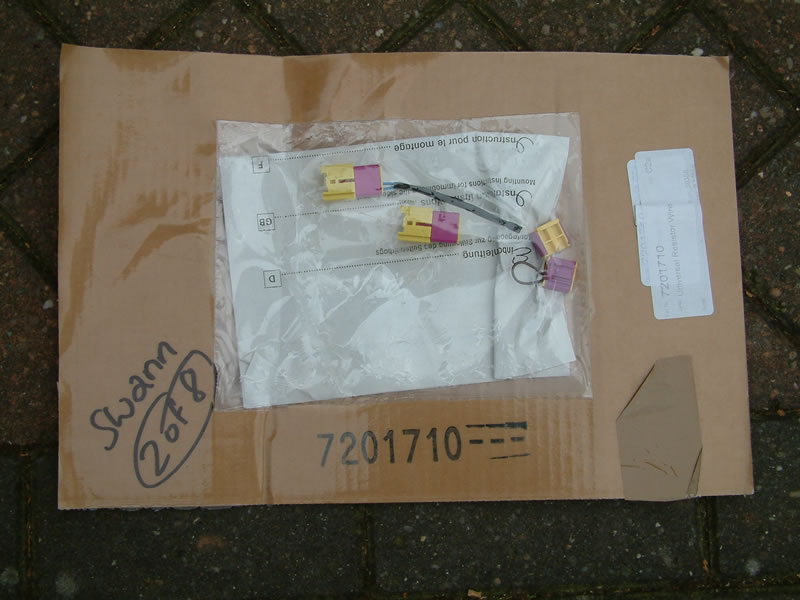
- 2 x 7201710 - Universal resistor kit for side airbag replacement £20.00 each
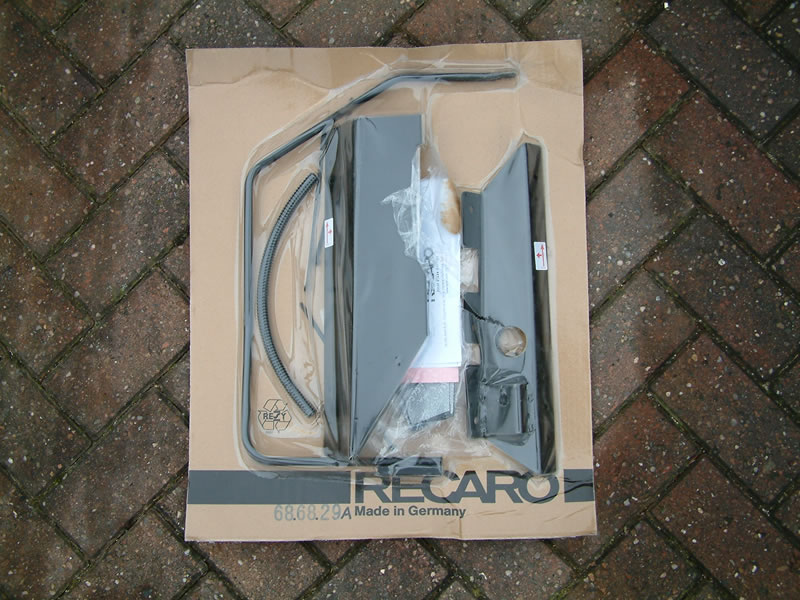
- 1 x 686819A - Mounting frame - Renault Clio ‘98-05, left hand side £114.00
- 1 x 686829A - Mounting frame - Renault Clio ‘98-05, right hand side £114.00
Total: £1358.00

Tools required
- 13mm deep reach socket & extension
- 8mm spanner
- 13mm spanner
- Torx T20 screwdriver
- Small flat blade screwdriver
- 8mm allen key
- Soldering iron & solder OR Rivet gun and rivets
- Wire cutters
- Crimp tool / needle nose pliers
Before starting
There is a microswitch on the tunnel side rail of the driver’s seat. This is riveted and needs to be removed so it may be a good idea to go and obtain a bolt to replace it before the car is immobile. You’ll need to unscrew the seat rail cover as described below.
Make sure the car is parked somewhere where you can open the doors fully and get underneath to the seat bolts. I was able to access the bolts without raising the car (182 with Cup suspension).
Ensure the car is cool - you’re going to have your hands near the cat and you don’t want to get burnt.
Lay out a blanket or soft mat to place the seats on when attaching and removing the mounting frames.
Removing the standard seat
Disconnect the battery (8mm spanner) and leave the car to let the capacitors for the seatbelt pretensioners and airbags (if fitted) discharge. I recommend waiting 20 minutes just to be sure.
Undo the bolts the seat (13mm deep reach). There are two for each rail, the outer two are under rubber bungs which need to be prised off. The inner two are accessed through holes in the cat heat shield.
Lift the seat up and tilt it back. This will make it easier to undo the connectors on the base and will also ensure that your face is out of the way in the unlikely event that the airbag goes off.
Unclip the wiring for the pretensioners and airbags - the connectors should slide off the clips attaching them to the bottom of the seat. It took me a while to work out how to undo the yellow and grey pretensioner connector - the yellow bit slides up as shown in the photo. The airbag one is a nightmare to undo and as it won’t be needed anymore just cut through the wires. At this point you’ll be vary wary of the airbag going off and cutting those wire is probably the nearest you’ll get to bomb disposal!

Lift the seat out and place it on the mat.
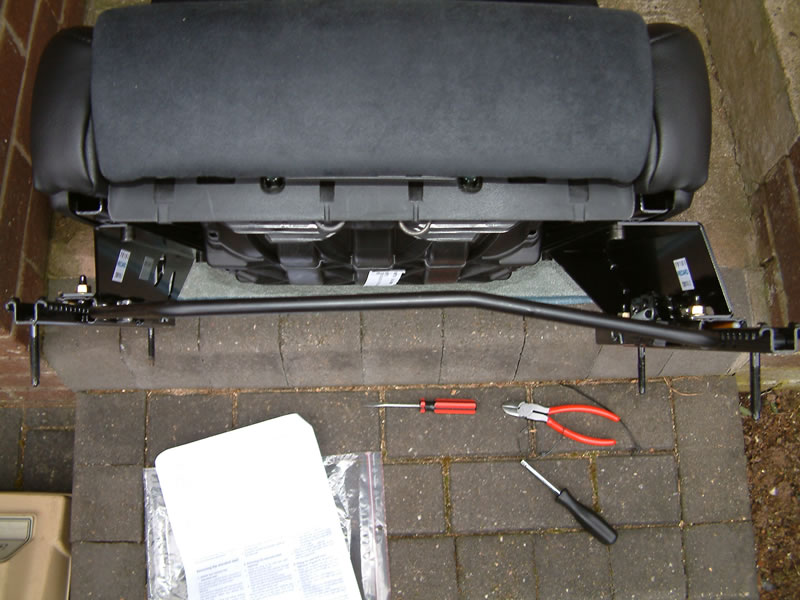
Removing the seat rails and pretensioner
Undo the Torx T20 screw at the back of the plastic rail cover on each side of the seat.
Undo the 13mm nuts that hold the slide rails to seat base. There are three on the tunnel side and two on the door side.
Unhook the tilt mechanism cable from the rail and remove both rails.
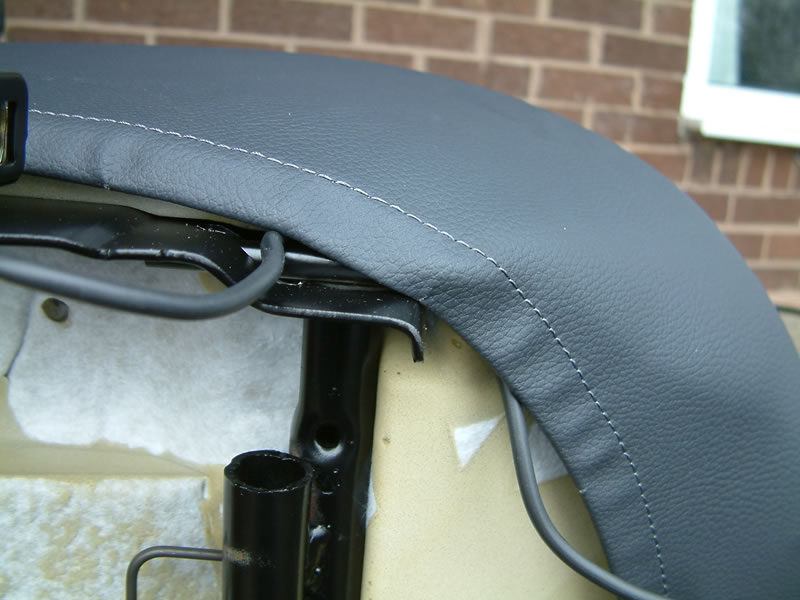
Cut the zip ties that hold the pretensioner and undo the Torx T10 bolt holding it to the seat. You’ll notice that the connector won’t pass through between the seat frame and covering so you’ll need to unhook the base covering elastic and slacken the tensioning cord by lifting the plastic ratchet with a flat blade.
There is an the microswitch on the tunnel side rail of the driver’s seat as described above. Unfortunately Renault have riveted it after passing the cable through the seat frame and the only way to remove it is to drill the rivet and redo it, or cut the wires and then solder them. I don’t have a rivet gun so I cut the wires.
Fitting the airbag resistors
Each kit comes with the parts to both fit non-airbag seats in an airbag car and airbag seats in a non-airbag car, or disable the airbags whilst retaining the same seats.
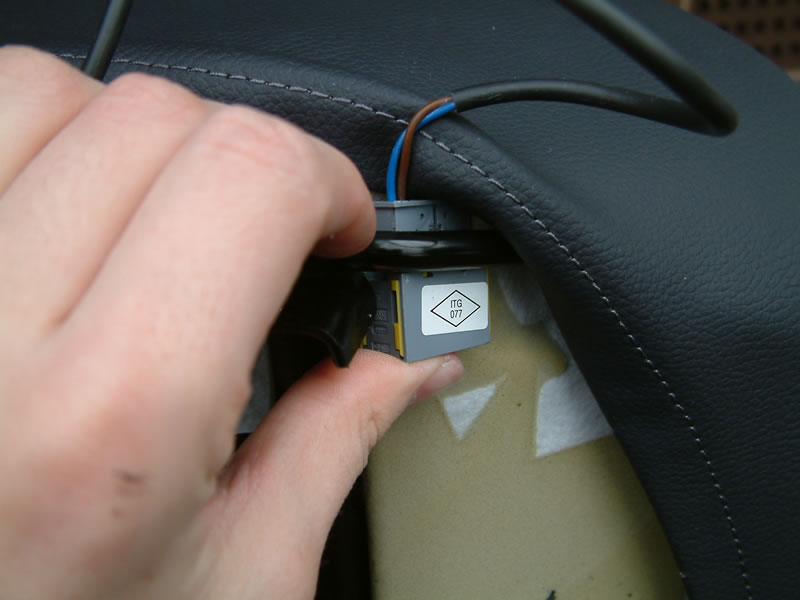
You only need the parts on the left in the photo until you refit the OEM seats, at which point you replace the Renault connector with the Recaro one so it connects up to the in car wiring we cut earlier. The connector with just the heat shrink contains the resistor.

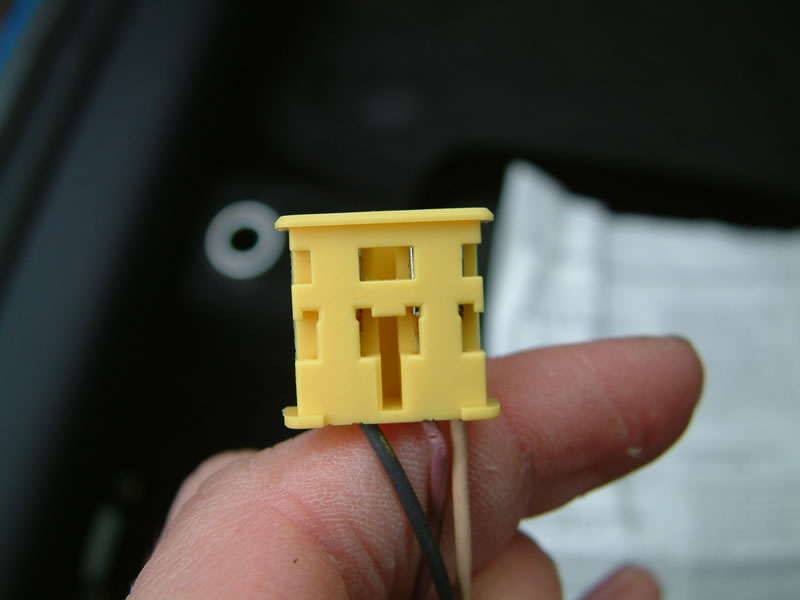
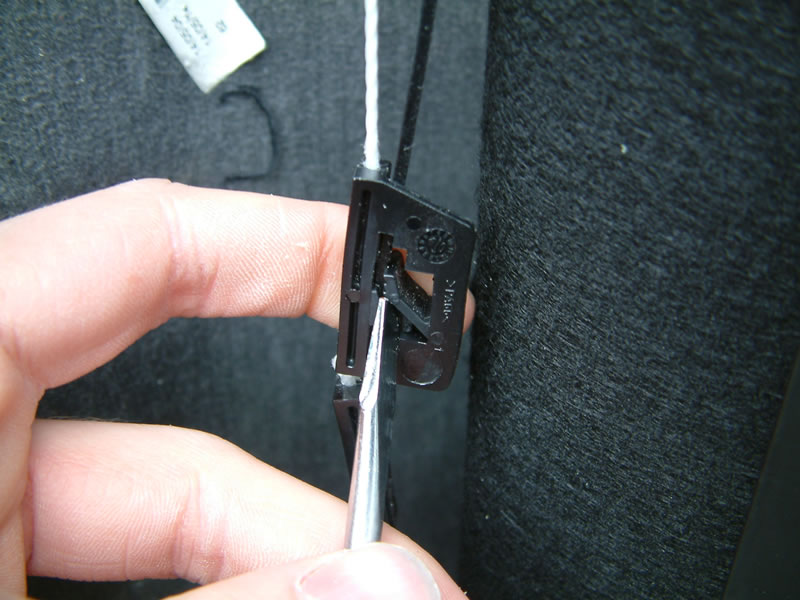
Strip the three wires where the OEM connector was cut and crimp a contact on each one. You can see how where the wire needs to sit in each contact by inserting the corresponding pin contact in and seeing where it stops.
Unclip the purple part of the plug connector and insert the wires in, making sure to align the little spring clips on the contacts with the notches in the connector. Insert the brown earth cable into the connector slot marked 3, and the other two into 1 and 2. It doesn’t matter which of these two go in which slot, so long as they match up when you fit the connector on the OEM Renault seats should you need to remove the Recaros.
The wires should push in and click in when they are fully inserted. At this point the purple part of the connector should clip on. If it wont go don’t force it as you’ll bend something, check the wires and try again until it clicks home.
Clip the resistor connector to the one you’ve just fitted.

Installing the Recaro seat
Place the Recaro seat on the mat so as the base is accessible.
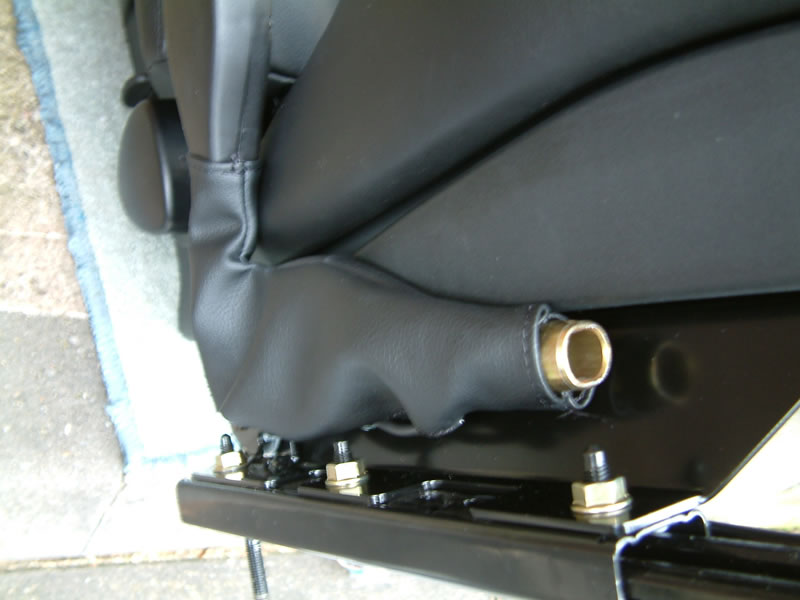
Fit the mounting frames. These take two 8mm allen bolts per side. Observe the labels on the frames the arrows indicate the direction of vehicle travel and the outside edge of the seat.
For some reason despite Renault using the original slide handle for their cars with Recaros it wouldn’t fit for me, fouling the base cushion, so I used the supplied Recaro one instead. It may be that Renault used a spacer? If anyone can shed any light on where I went wrong I’d like to know, as the Renault handle has a more OEM look.
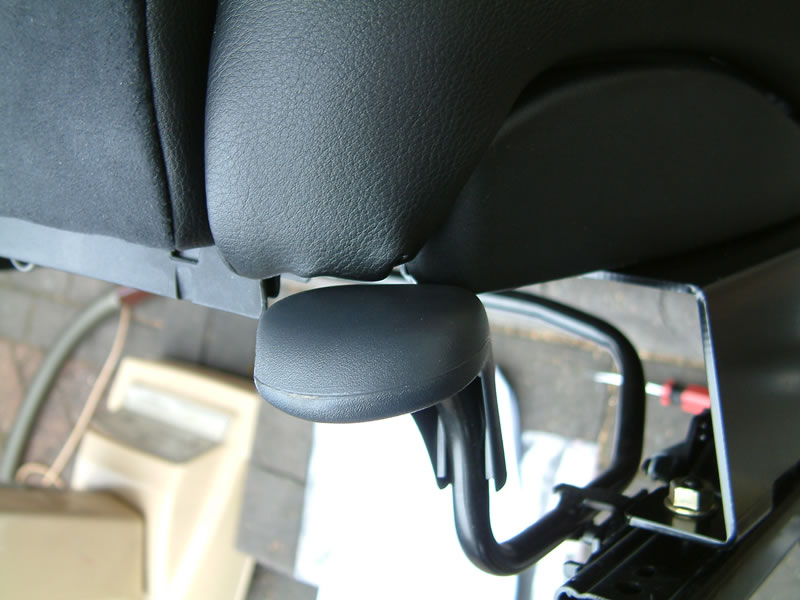
Attach the pretensioner to the frame but don’t do up the bolt just yet. Slide the leather cover over, passing the connector through the slit in the bottom. Close the Velcro and when it is all in position tighten the bolt.
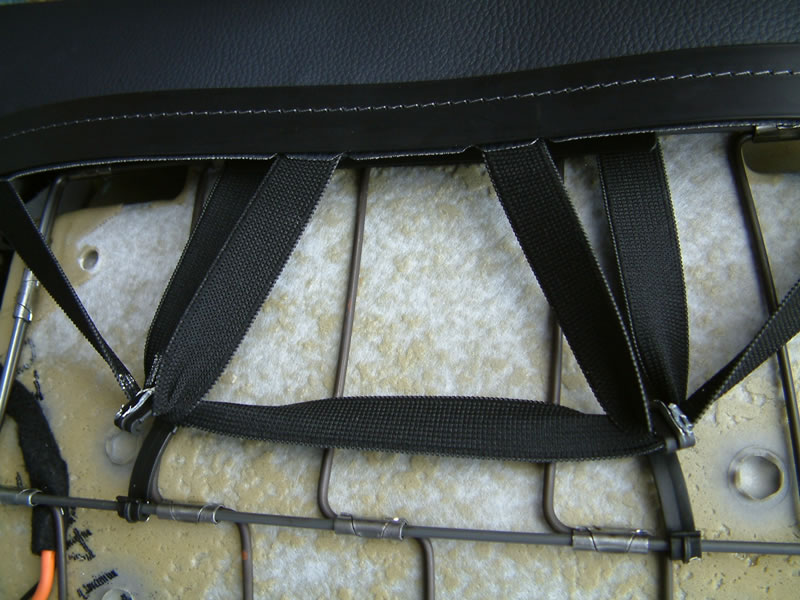
Wrap the two part cable sheathing over the pretensioner wire. On the driver’s seat there are three wires so it’s a bit of a squeeze but will fit. Pass the wire through the large round hole in the mounting frame.
Fit the seats back into the car. Re-fitting is the reverse of removal as they say. Clip the pretensioner connecters together then Ensure the seats slide and tilt correctly.
The wiring will need to be secured but it’s a good idea to check the resistors are working properly. Reconnect the battery and start the car. The airbag light should go out as normal. If it doesn’t then the resistor wiring didn’t work. Be aware that this will probably have triggered a fault code to be logged in the ECU and even after fixing the wiring the light will still show and you’ll need to get your dealer or someone with the Renault CLIP system to clear the fault.
Once you’re happy that the resistors are working zip tie up the loose cables. Job done. Go for a drive!

