Fitting a Cup Spoiler to a Clio 197 or 200
Don't wing it...
Added: 23rd February 2011
The Cup spoiler is an essential addition for any 197 or 200 owner looking to give their car a racier edge. Many cars were specified with it as a dealer fit option, but if like me yours didn’t come with one, you can easily add it aftermarket. The spoiler can be purchased from any Renault dealer or more cheaply on eBay - quite a few sellers being Renault dealers anyhow.
Fitting isn’t very difficult, just a bit nerve-wracking given that it involves drilling four holes into your car. On the upside if you get a hole slightly wrong it’s not a disaster as the spoiler itself will obscure this. Allow a couple of hours so you are not rushing. It can be done alone, but is easier if you have a helper to hold the spoiler as you bolt it on.
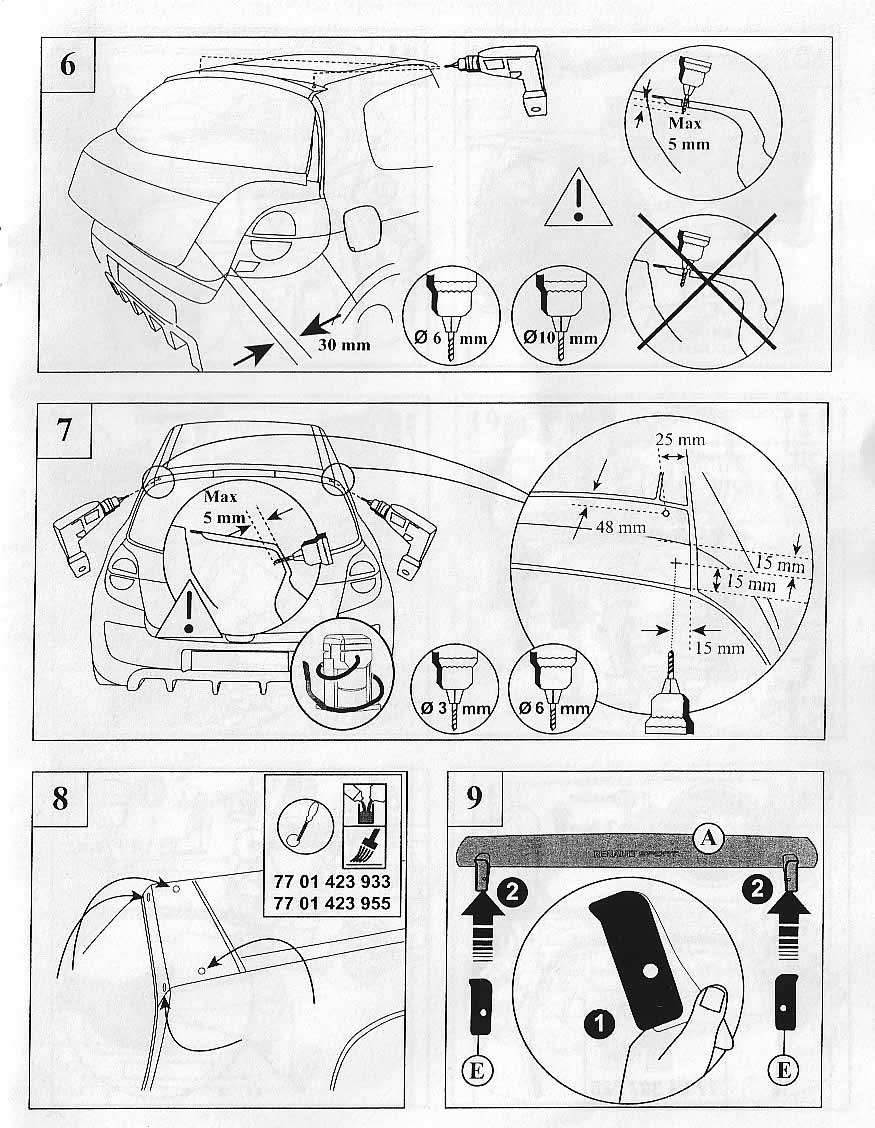
Renault’s instructions
Renault supply instructions with the spoiler, but as these are intended to be multilingual they are completely pictographic and don’t make the process as clear as it might be. They also list some steps which are unnecessary, and one or two which are completely undecipherable!

Painting
First thing you’ll need to do is get it painted. Any competent bodyshop should be able to do this but prices and quality vary massively so it’s always worth shopping around and trying to get some recommendations for shops in your area. I paid Ł100 to have mine sprayed Glacier White.
Once it’s painted, here’s how you get it on the car.
Marking the drilling points
Ensuring the tailgate is clean and free from grease where the spoiler will mount, this first part of the process can be done in two ways:
Remove the backing paper from the adhesive strips on the fitting guides (G). Attach the guides to the spoiler in the threaded holes.
Line up the spoiler and push down on it so that the guides stick to the tailgate.
Remove the spoiler leaving the guides stuck to the car. Ensure they are stuck well by pressing down on them.
I found that this didn’t work too well - it was hard to get the spoiler aligned correctly. Fortunately the instructions state the measurements so you can mark the drilling points by hand. Use the plastic guides to prevent the drill from slipping when you drill the pilot hole.
Stick a strip of masking tape on each side of the tailgate where the holes will be.
Measure 25mm in and mark points about 4cm apart.
Measure 48mm along this line from the front of the car then mark a point - this is where you need to drill.
With a 3mm bit, place the guide on some scrap wood and drill through it, then peel the backing paper, align the guide over your drill point and stick it down.

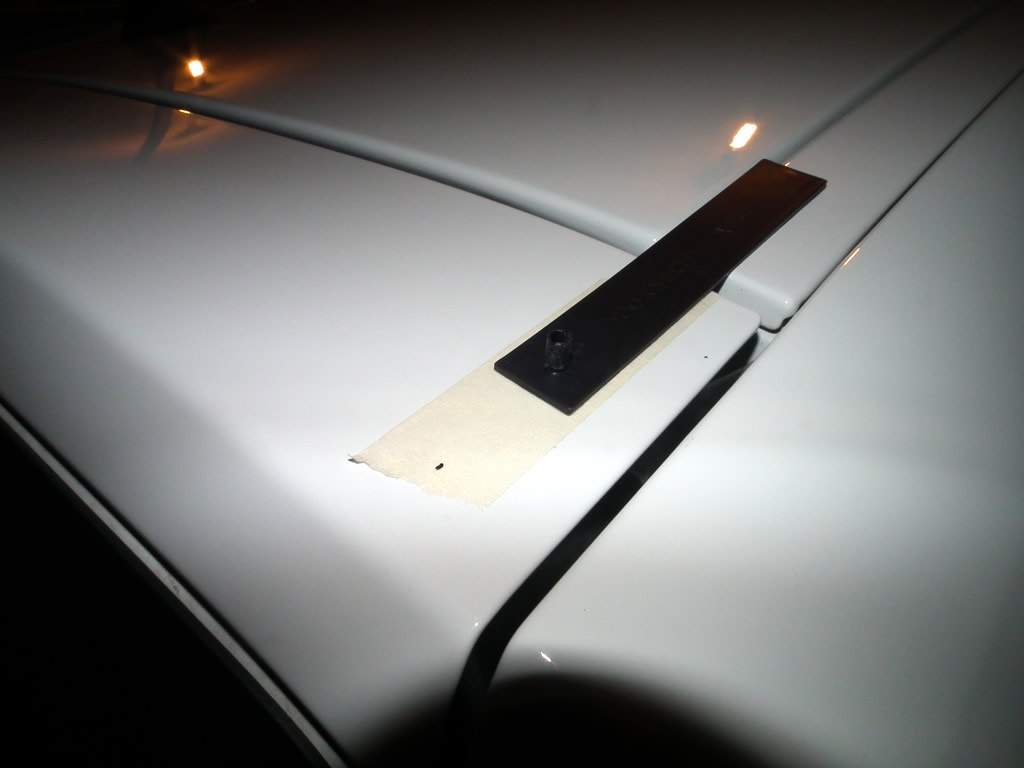
Using the masking tape again, mark a point in the back of the tailgate at each side 15mm from the top and bottom and 15mm from the side.
Drilling the holes
Swarf and metal filings from the drill will go everywhere, so have a vacuum cleaner on standby ready to vac them up after drilling each hole. Also hinge the wiper arm off the back window - I found that metal was collecting on the wiper blade.
If possible, make sure the protrusion of the bit is no more than 5mm greater than the depth of the hole in the guide and the depth of the tailgate. Using the plastic guides each time drill the pilot holes in the top and back of the tailgate.
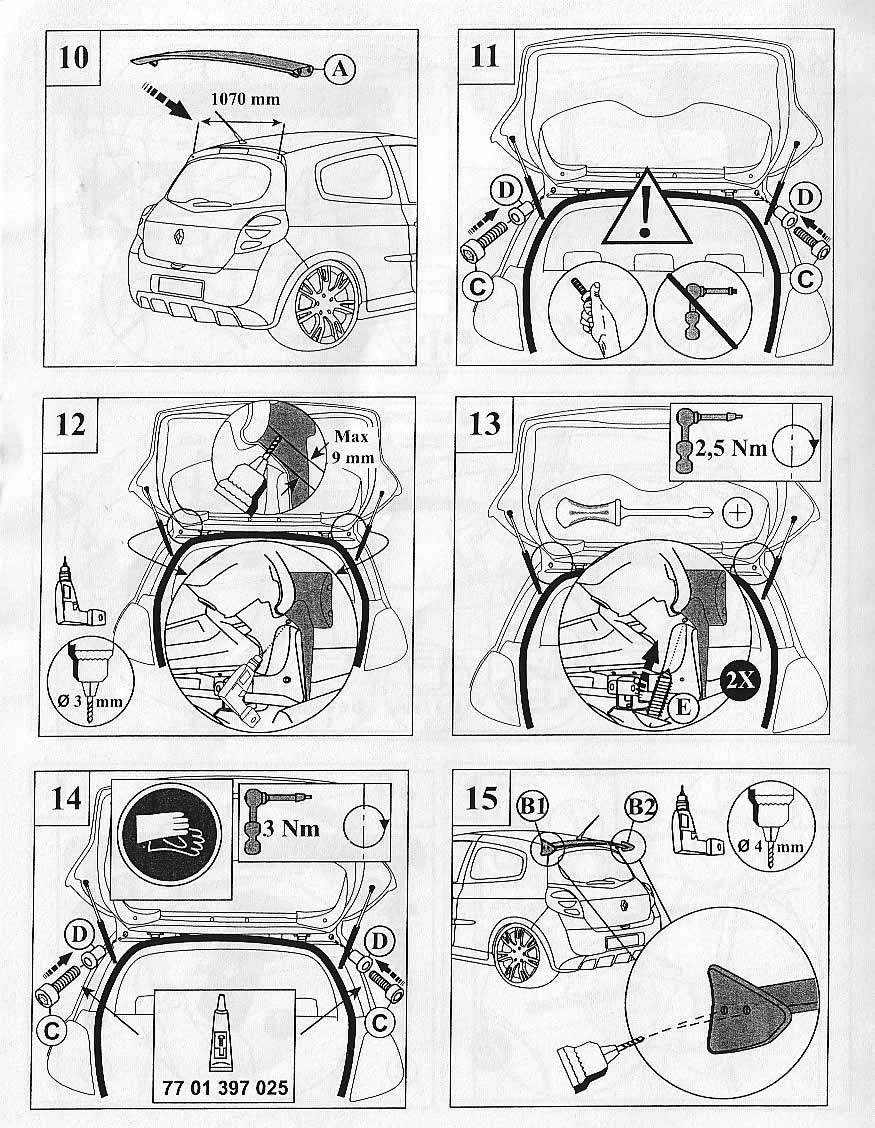
Enlarging the holes
At this point the instructions say to use a 6mm bit then a 10mm to enlarge the top holes. The 10mm is a little too large, whereas 8mm is the perfect size for the plastic washer. I found that going from a 6mm to an 8mm wasn’t enough of a jump and caused the drill to "snatch" and judder, so I’d recommend going from 3mm to 5mm then to 8mm.
Enlarge the top holes with the 5mm bit, ensuring you don’t to far through the other side. Fortunately there’s a fair amount of space so unless you have a longer than average bit, it should be fine. Repeat with the 8mm.

Enlarge the back holes to to 6mm.
The instruction state to paint or otherwise rust-proof the holes. I’d advise waiting until you are sure the holes are in the right place first.
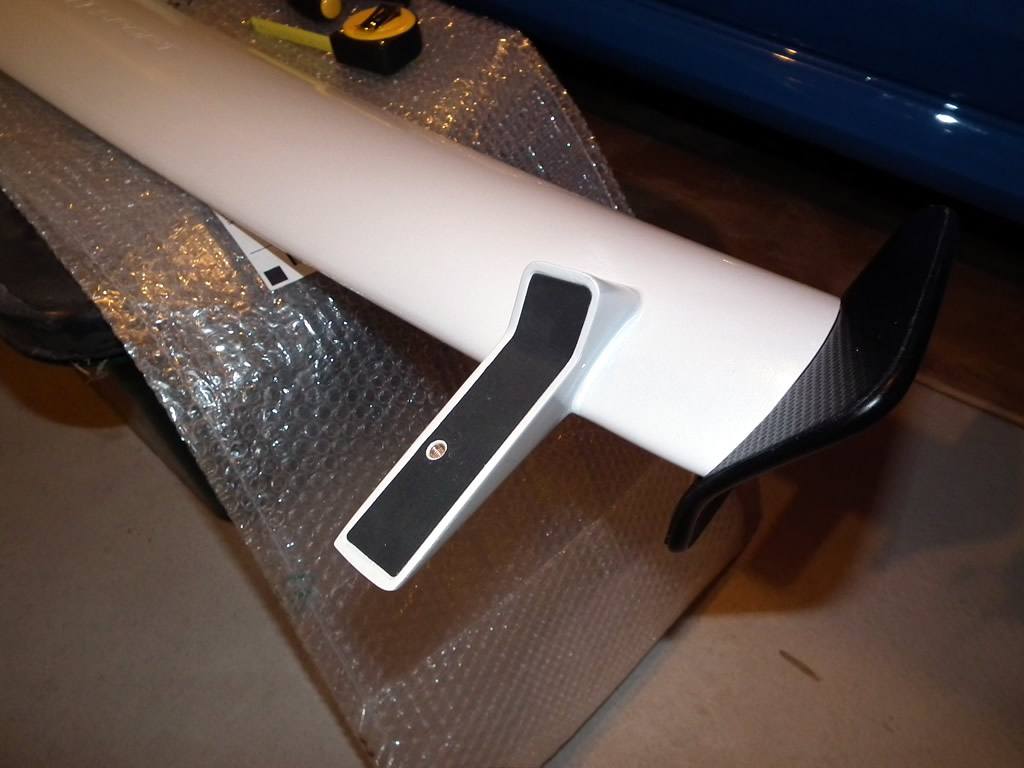
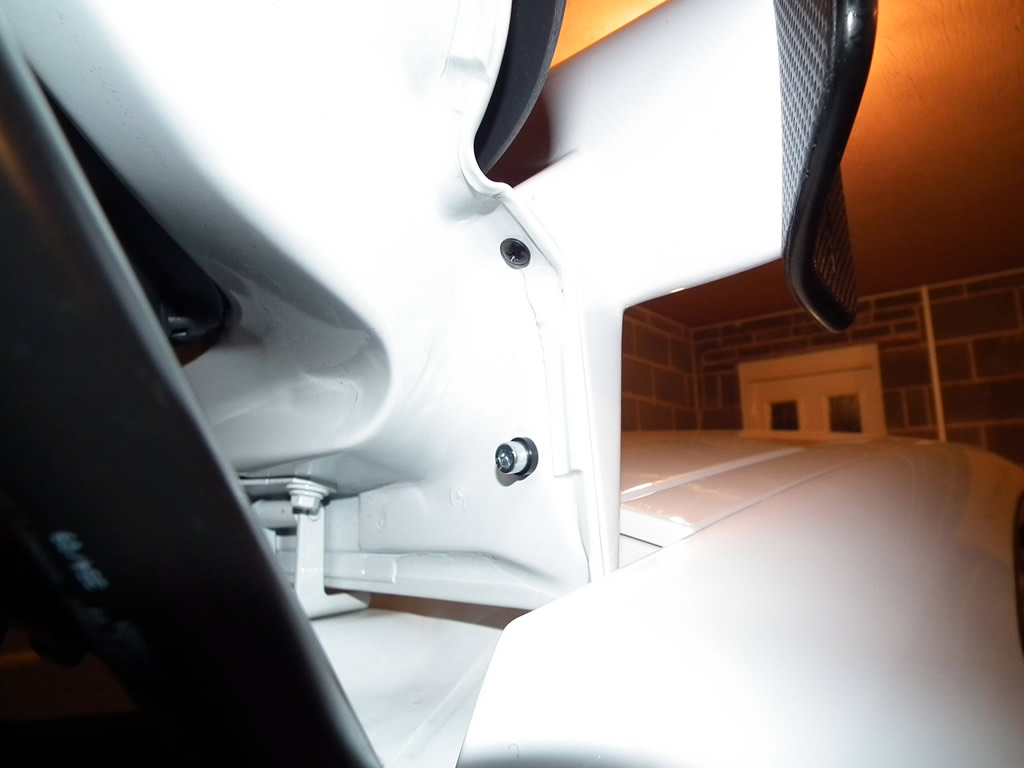
Test fit the spoiler
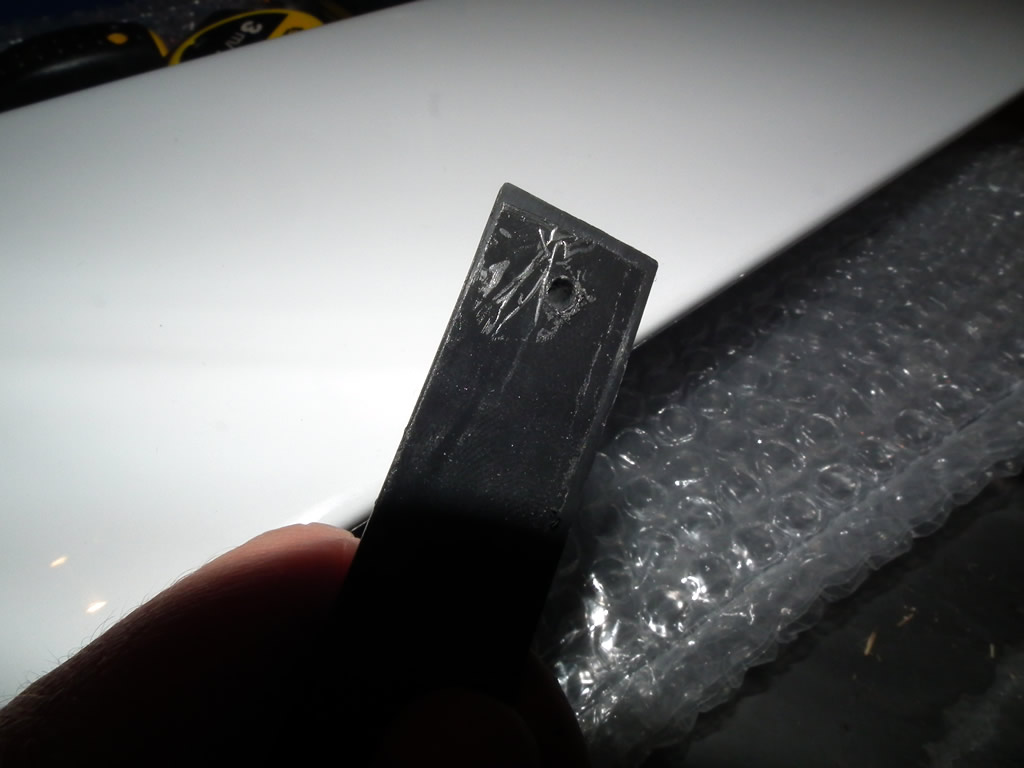
Apply the foam pads to the spoiler, paying attention to which is left and which is right.
Open the tailgate and insert the bolt washers (D) then hand tighten the bolts (C). Theres a bit of flex in the spoiler so you have a millimetre or so of variance in where your holes are. If the bolts won’t go through you’ll need to enlarge the holes.
Screw in the rear screws and tighten the top bolts
With a 3mm bit drill into the spoiler through the holes in the tailgate. Be careful not to go too far. You want to drill in the length of the screw but no more. Screw in the screws (E).
The instruction state to apply threadlock to the bolts then tighten them. I didn’t bother, instead I shall check the tightness from time to time.
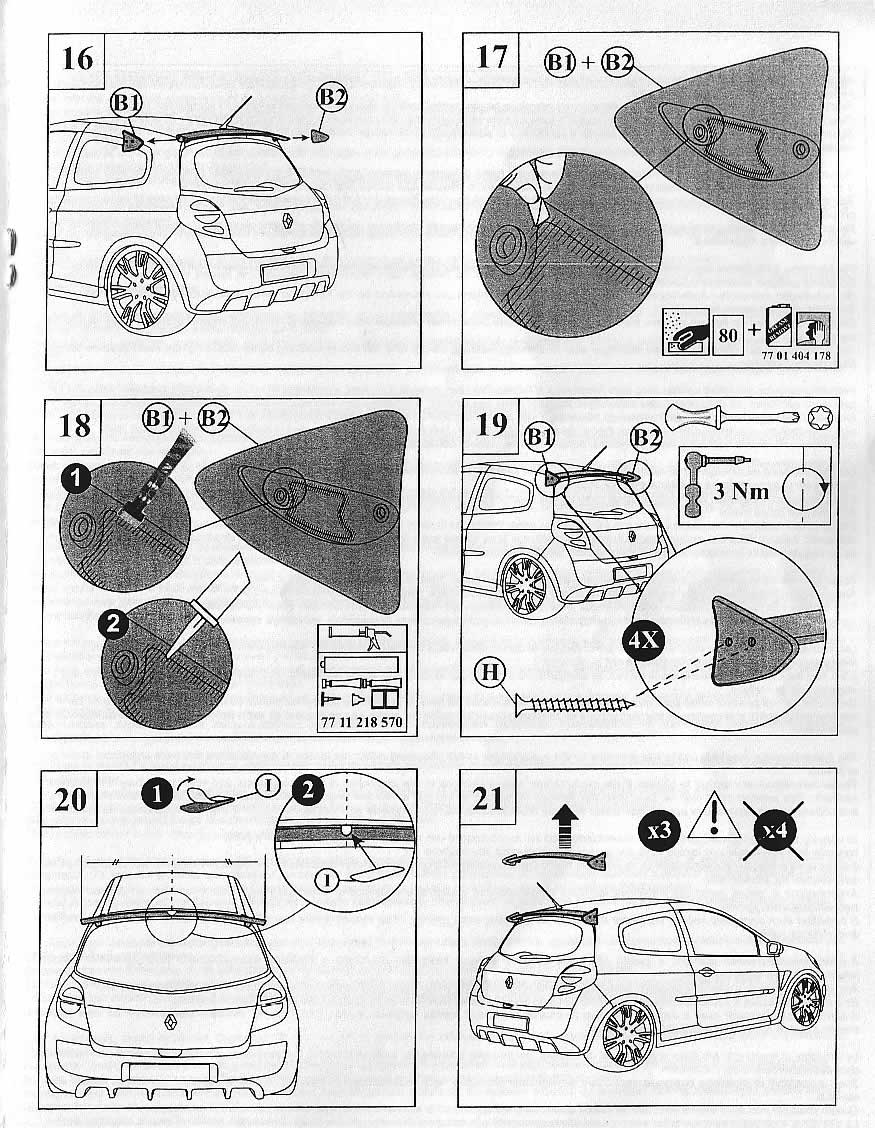
Final steps
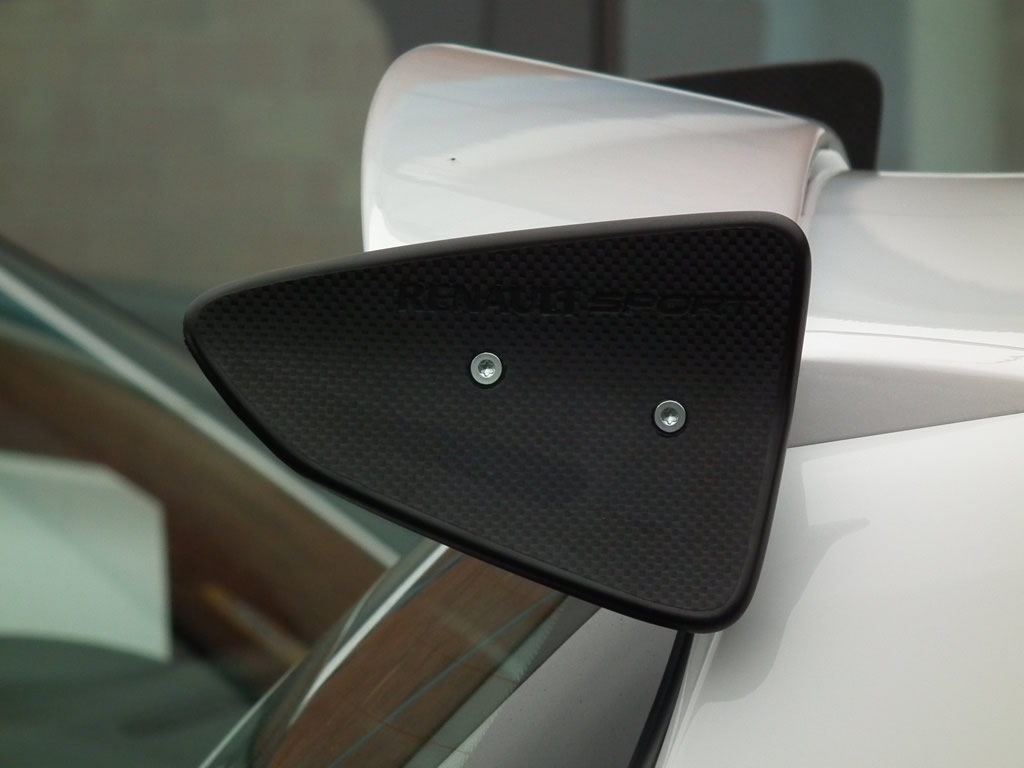
The instructions now state to drill through the holes in the end plates into the spoiler. I found that there were already holes in the spoiler and the end plates just screwed straight on.
The next steps involve sanding the spoiler ends and sealing the end plates on. I’m not sure why this is necessary so I didn’t bother.
The final task is to apply the protective decal to the centre of the spoiler. This stops the aerial rubbing on it when the boot is opened.
If everything fits and aligns correctly, remove the spoiler and paint the inside of the holes where bare metal is exposed. I used white primer from a Glacier White touch up paint kit. Allow to dry for the time specified on the product’s instructions before refitting the spoiler.
The instructions state one more step, although it is completely unclear what it means. If you understand this please let me know!